CHECK BEST DEALS COMPARE PRICES & SPECIAL DISCOUNT ABOUT Elite Home Fashions Dawson Collection Shelved Bathroom Space-Saver with Storage Cubby, White
Bathroom Shelfs CHEAPEST ON LINE DEALS...
Elite Home Fashions Dawson Collection Shelved Bathroom Space-Saver with Storage Cubby, White
Bathroom Shelfs
cheapest deals price black friday's deals and discount
Elite Home Fashions Dawson Collection Shelved Bathroom Space-Saver with Storage Cubby, White
Bathroom Shelfs for BLACK FRIDAY DEALS 2011 LOWEST PRICES & BEST PROMOTION !!!
  |
Elite Home Fashions Dawson Collection Shelved Bathroom Space-Saver with Storage Cubby, White Product Brand : Elite Model : 6803 |
|


Bathroom Shelfs
Special for cheapest price black friday's deals and discount
Customer Review :
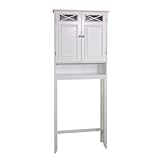
Bathroom Space Saver : Elite Home Fashions Dawson Collection Shelved Bathroom Space-Saver with Storage Cubby, White
This storage cubby does come with instructions, but I felt they were not detailed enough, so here are some modified instructions for you.
Step 1: Husband brings box in from back porch. Excitement ensues.
Step 2: Open the box and start unpacking the pieces. Tiny pieces of styrofoam go everywhere.
Step 3: Stop unpacking to put the cat in the extra bedroom where he cannot eat styrofoam. Resume unpacking.
Step 4: Lay pieces out on kitchen floor in alphabetical order. Realize that you have broken B while removing it from the mound of styrofoam. Resume unpacking.
Step 5: Find a piece with a "Made in China" sticker. Realize this is probably why piece B broke with such little pressure. Resume unpacking.
Step 6: Finish putting pieces on kitchen floor in alphabetical order. Blow all styrofoam off of them.
Step 7: Vacuum up all the styrofoam so the cat can come out.
Step 8: Get some Quick Grip glue out of the extra bedroom and glue piece B back together. Clamp while it dries.
Step 9: Realize that pieces K and L are also put together with crappy Chinese glue. Pry them apart so you can reglue them with superior glue.
Step 10: Glue and clamp piece K. Realize you don't have enough clamps to do L as well. Resolve to finish tomorrow.
Step 11: Next day: remove clamps from B and K. Glue and clamp L. Resolve to finish tomorrow.
Step 12: Next day: remove clamps from L. Go through screws and other small pieces to make sure they are all there.
Step 13: Get annoyed as it seems that pieces #9 are missing. Start construction anyway, hoping they will turn up.
Step 14: Toss out crappy Chinese glue that was sent along with project. Get Quick Grip again to glue in the dowels.
Step 15: Realize that pieces #9 were shipped already inserted into the knobs. Rejoice. Resume construction.
Step 16: Try flipping project over to insert connectors. Realize too late that it was unnecessary. Crack piece L where it connects to B while flipping it back over. Resume construction.
Step 17: Realize that putting the crossbar on the bottom part of the legs is a near impossibility if installing the project over a toilet. Haul the entire project into the bathroom and decide to finish the rest of it before bothering with the crossbar. Resume construction.
Step 18: Realize that the doors need to be held by someone else while installed. Put knobs on them and set them aside.
Step 19: Rejoice when husband gets home. Complain about the crossbar and the doors. He gets his Leatherman and manages to get the crossbar on after much huffing and puffing.
Step 20: Ask husband to hold doors while you screw them on. He complains and makes sexual innuendo, but does it anyway. Attach door G.
Step 21: Realize that, as careful as you were about reading the (poor) instructions, you forgot to check which direction the doors go on. Consequently, the metal for the magnet to attach to is on the wrong side. Remove door G.
Step 22: Check instructions just in case. Attach both doors correctly.
Step 23: Clean up little pieces of plastic that the cat is trying to eat.
Step 24: Wish that they had included another shelf behind the doors and some touch up paint instead of crappy Chinese glue.
Moral of the story: Pay really good attention to the instructions, and make sure you are clear on details as to what holes go where and what direction the groove goes.
Buy Best Card Paper-Office 4 Best Buy car part warehouse-Automotive